Showing posts with label craft. Show all posts

Monday, July 16, 2012

My Jar of Hearts...

Howdy pretty people! I thought today I'd brush the cobwebs away and pop back into my sadly neglected blog to share with you a quick little project I got up to over the weekend... I shared an image I discovered recently on my Facebook page  and lots of you loved it; I loved it too! It was just an inspiring image, no tutorial but I knew it would be super easy and it turns out it was! This was my original inspiration:


... and here's what I whipped up in literally 15 minutes on Saturday afternoon:


This little jar of hearts makes me super happy and can perch merrily on a sunny windowsill, or perhaps be used as a party favour, or propped upon a shelf... so many options! Fern prefers to use hers as a must ache....

If you like this little jar of hearts and would like to make your own, heres a simple instruction guide just for you!

You will need:
- Coloured felt
- bamboo skewer or similar
- Wadding
- Needle and thread
- Sewing machine (or handset if you are keen)


1. On a scrap of paper, fold in half and draw half of you love heart shape so that when you cut around you have a perfectly symmetrical love heart!


2. Use this folded piece as your template, tracing around your folded felt piece and cutting out. You will need two of each colour to make one love heart.

3. Pin the two felt shapes together and sew around the outside leaving a few cm's down one side. Remove pins and turn inside out. Stuff with wadding, then sew side closed with needle and thread. Stick the pointy end of your skewer up the pointy end of your love heart ;) ........... step back, and admire your handiwork!!


4. Continue until you have lots or just a few and smile... don't you just love your jar 'o' hearts? xx


Thursday, June 7, 2012

A few NEW Goodies from my studio...

Hi guys! Today I want to share with you some new products Ive been working on for my store... a while ago I felt I was talking about my work too much so I stopped sharing it so much with you, but I have decided Ive gone too far the other way seeing as this IS my blog to share with you! Anyway what I want to show you are some things I've made lately of the non-clothing variety... I LOVE making clothes for babies but sometimes I like a break to develop new ideas and here are a few I'm really proud of with more to come! Enjoy this little sampling... xx

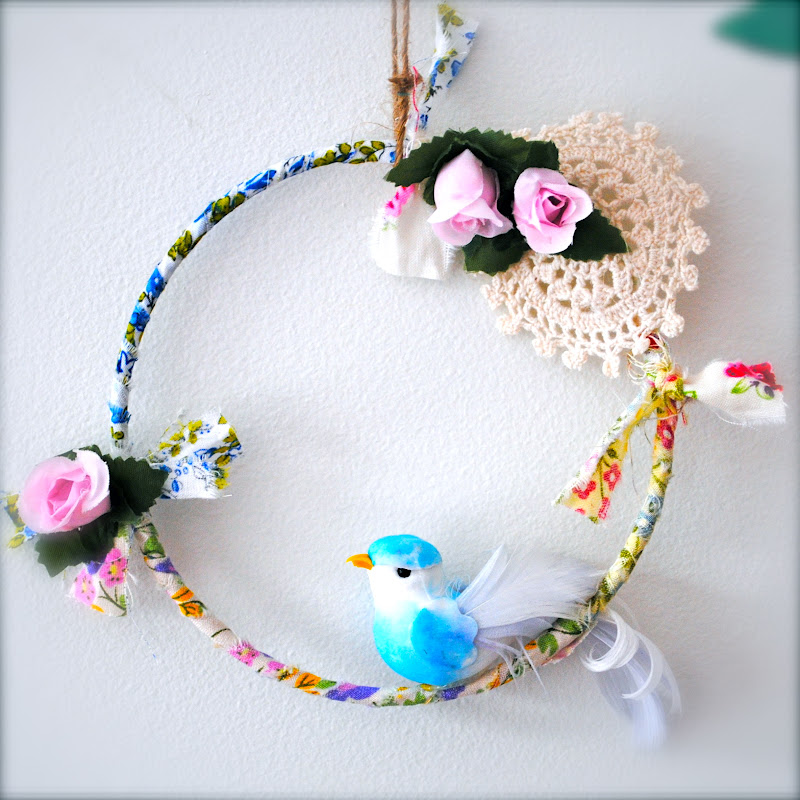
Pastel 250mm home wreath with birdie and butterfly $59

Baby mobile $24

Boy Boudoir Owl wall hanging $28


Hairclip holder with bonus hair clip $19


Three Dimensional butterfly wall hanging $18 

Hanging birdies $9 each through custom order

Hairclip holder with hair clip $19


Baby mobile $25

Personalised nursery pillow $29.95-$49.95


Baby Mobile $25

Bright baby mobile on sale $21


DREAM wall hanging $24

Monday, May 28, 2012

What to do with those ole Vintage Handkerchiefs...

There is something unapologetically nostalgic about floral, pastel, musty smelling 'kerchiefs from the yesteryear, non? I think so, anyways...

Recently, I acquired a little collection of them. There they were, all standing in a row. Big ones, small ones... I couldn't stash them away, I just couldn't.

So I didn't.

I made this with them instead:


Sigh. Bunting is fabulous at the best of times, but I love how unique this string is, that it is both handmade AND repurposed with a touch of vintage. Despite how much I love it hanging in Fern's room, I can't keep it. Fern already HAS a string of bunting that was handmade when she was one by her nan and I and I have no other suitable home for it in my home... 

So! My lovingly constructed string of bunting is up for sale in my store for $29.95 and I am excited to see it go to a loving home. Visit my store to view and tell me..... what other ideas how you to repurpose old handkerchiefs? Do share, because I'd love to give another project a go!

ps. For those of you who admired Fern's crochet rug that I consigned for her bedroom recently, you can buy your very own here. I was well pleased with mine and I'm sure you could ask for custom colours as the shop owner is very obliging and I'm still marvelling at what a great job she did of Fern's!

Have a great week, peeps! xx

Wednesday, April 25, 2012

Make: Girl's Butterfly Headband!

Over the weekend, Fern and I did a little craft we thought we'd share with you...

Fern's handmade headband!

We made girlie headbands! So super-duper easy-peasy that YOU can make some too! We made one for Fern and one for a friend. Want to know how to make one too?

We visited the $2 shop to start with and chose the following materials at a total cost of $7.50


You need:

Headbands (obviously!)
Embellishments: flowers, butterflies, beads, birdies, ribbons, crochet bits -- anything goes!
Hot glue gun (or strong craft glue)
Fabric scraps

The first thing we did was tear a thin strip of fabric and wrap it tightly around the whole headband, fastening at each end with the hot-glue gun.


Then, I glued a piece of vintage crochet I found lying around and one of the butterflies from the $2 shop onto the side. (ooops no pic of this step!)

We then started twisting the fabric flowers around the side and top of the headband:


And truly, the whole thing took <30 mins and this is the finished product:


As mentioned previously, we made two -- one for Fern and one for a friend at preschool who will be getting a little surprise in her cubicle this week! We hope she likes it!

Give it a go with your little girl one rainy day... you can't get this project wrong and you can go to creative town! Enjoy! xx

Wednesday, December 21, 2011

Handmade Gift Idea for <$5

The night before I sent Fern off to preschool for the last time this year (she goes once a week) I had a mild panic attack. My best intentions to gift her wonderful, caring teachers with something thoughtful were looking a little bleak. What to do? I couldn't send her with nothing,  just couldn't!

But never fear. My never-fail, so quick its almost criminal recipe for 'nanna cookies', pilfered from last year's "Afternoon Tea" recipe book by Frankie magazine saved the day... and with a little creativity, some bits from my craft-box and a $4 glass jar from Coles, I came up with this:


So easy! 

Bake cookies. 
Find a bit of leftover wrapping paper and cut to wrap around glass jar. Fix with sticky-tape.
Wrap a paper doily around top of jar and affix with ribbon, string or (in my case) piping cord. Slip a candy cane and gift-tag (a Dulux sample-card) to the top and give away with pride!

Fern's teachers seemed well-pleased. Perhaps they were being polite. No matter!

What did YOU gift the kid's teachers this year? Do you gift them anything at all - or am I being the world's sulkiest parent in doing so?! 


Monday, December 19, 2011

She of no Christmas Tree....

This year, I have no Christmas tree. Nothing. Nada. Nothing with which to place presents under; nothing twinkling from fairy-lit branches groaning from the weight of glass baubles. No folks, this year my home is almost barren of Christmas decoration!

To be honest, I had serious misgivings about having a Christmas tree long before I dragged the box out while my son was sleeping at the beginning of December. When I pulled the bag of decorations out and onto the kitchen table, I felt nervous.

At the same age, I was able to wedge the tree behind two armchairs so that my daughter could look... but not touch. And it worked, for the better part. But I know boy-o better than that. The boy can leap tall buildings with a single bound; Ive seen him do it. And an armchair would be simply a launching pad to greater heights. No, short of suspending the tree from the roof there is no option to have it at ground and intact 5 minuteds later.

With apprehension, I added a few wayward felt decorations to the tree. Maybe I could get away with a minimal approach this year?

But I knew better.

And sure enough. Once sonny-boy awoke from his afternoon slumber he was like a bee to the honeypot. Decorations as far as the eye could see. Christmas lights wrapped around little neck.

Glass baubles - ones carefully brought back from Europe years ago - smashed into smithereens. The kitchen table, as it would turn out, was not high enough.

And the tree? Within 24 hours, knocked to the ground, decorations spilling under every piece of furniture.

So, I packed it all away. Call me a defeatist. But I could not think of what else to do!

But there was plenty I could have done of course, much more creative than the glass hurricane vessel of colourful baubles I've arranged on the table as a Christmas compromise. But how am I to lay the presents on Christmas eve out on the kitchen table under a hurricane vessel?! 
I ask you.

Too late, I discovered some alternatives I should have considered. That maybe next year I WILL consider. But next year is next year. Maybe my son will have matured. Maybe my son will have lost interest. Maybe my son will have moved on from his relentless passion for destruction. And maybe pigs will fly.

If you are in the same predicament, you too might gain some inspiration from some of these alternatives to the 'traditional' notion of a Christmas tree. All of which you can make yourself. All of which you can find here:


What say you? Do your young kids allow a Christmas tree to sit unscathed on your living room floor? Or are you forced to seek alternatives like moi? Do share!! xx

Wednesday, December 7, 2011

and so she (finally) covers a lamp...

I did it. Only took me 6 weeks to get around to it but folks, I covered me a lamp! Turned out to be (like most crafty endeavors) super-duper easy-peasy and made me wonder why I didn't do it sooner. But she's covered, folks!

I really appreciated the words of wisdom from Anna, Janette and Emily on how to do such a thing but actually when it came to the task and my computer wasn't turned on, I just followed my nose! There are countless covering lamp tutees out there on the web so I won't bore you with my own how-to... I made one teeny tiny mistake and had to discard my first fabric cutting, but second time worked a treat! And so, with nothing more than a bit of fabric, some fabric glue, a hot-glue gun and a bit of trim my black Ikea monstrosity now looks like this:


And I'm happy! Looks all kinds of flabby in my new studio which - yes - I will reveal to you next week. I am happily ensconcing myself in my studio at every available second and I'm like a happy pig in mud! Can't believe it took me 5 years to gat around to it! What crafty endeavours have you got up to this week??


Tuesday, November 15, 2011

How the heck do you recover a lamp?

You know what happens.... you spy an amazing image somewhere about, like this one:

love everything about this shot. Not sure where I saw it, but Im thinking it might have been from Absolutely Beautiful Things... it screams Anna Spiro, don't you think?

... and in a moment of gloriously carefree optimism you decide 'hey. I can do that' and find yourself digitally scanning your Visa to buy a piece of designer fabric like - oh - this one:


... and decide to recover yourself a lamp. In my head I saw a gorgeously glossy white organic shaped base with this Heather Bailey fabric wrapped around the shade. My upcycled and altogether inspiring lamp would jauntily perch on my new studio desk, lighting up my work until the wee hours and I would glance at it every so often, patting myself with pride.

But now I have the fabric (which really is lovely) and a lamp, which is actually one from Ikea and is jet black. I mean, how do I intend to get a black lamp.... white? Can I get away with spray painting it, and even if I can, what did I intend to do with the black cord!!?

And so now I am in a quandry. I havn't quite given up on my dreams of a recovered lamp, but for now its in my too-hard pile. I quite simply dont know where to start. Im intimidated, folks!

Have you ever recovered an old lamp? How did you do it?!? Do I need special glue? Will any ole spray paint do the job? Your feedback appreciated!